07/02/14, by Dennis Kennedy
Tools, Tips & Techniques
Welcome to the last installment of circular saws. Earlier in Circular Saws 101 we talked about why you might need a circular saw and what to look for when buying. Then, in Circular Saws 102, we talked about different types of saws, some safety tips, and blade upgrades. But this week it’s all about accuracy and ensuring a straight and smooth cut. If you follow the three steps outlined below, you will be well on your way to achieving a perfect cut!
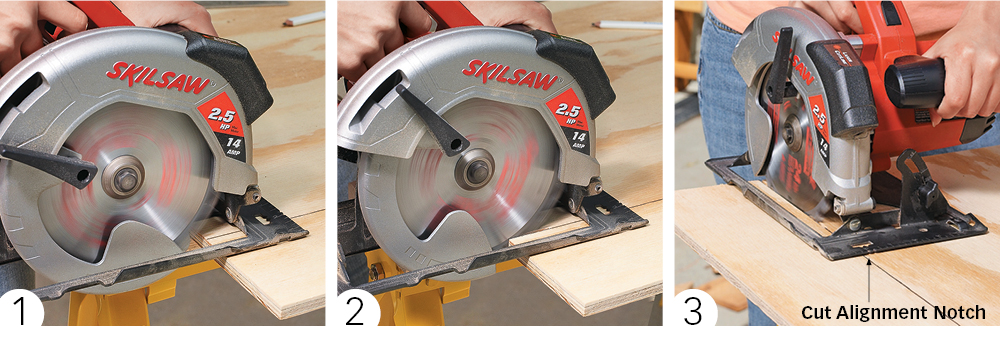
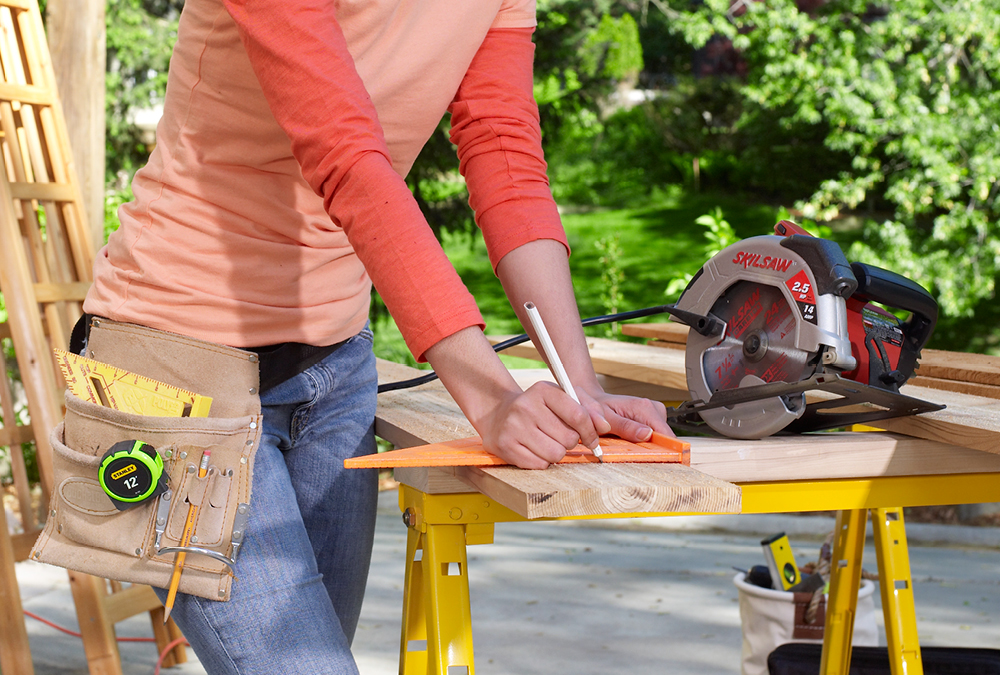
Step 1: Line up the blade. To get started accurately, you need to align the circular saw’s blade with the cut line. There is a notch on the saw’s “foot” that lines up with the blade, so you can use that notch to position the saw properly. Then back the saw away ever so slightly, so the blade is not in contact with the wood, and pull the trigger to start the saw (photo 1).
Step 2: Start the cut. As you push the saw forward to engage the blade with the wood, you’ll be looking not at the saw’s foot, but at the blade itself to make sure it’s cutting along the line as you desired. If the blade is cutting cleanly along the line, continue to move it slowly and smoothly into the workpiece in as straight of a line as possible (photo 2).
Step 3: Look ahead. If you’re making a longer cut across a panel of plywood or lattice, now is the time to take your eyes off the blade and move them back to that notch on the foot. By keeping your eyes trained ahead like this, you are more likely to keep moving in a straight line, just like driving a car. Newer saws have laser guides that help immensely with this step (photo 3).
There will come a day when a freehand cut isn't precise enough. For those occasions I'd like to offer up a couple different strategies.
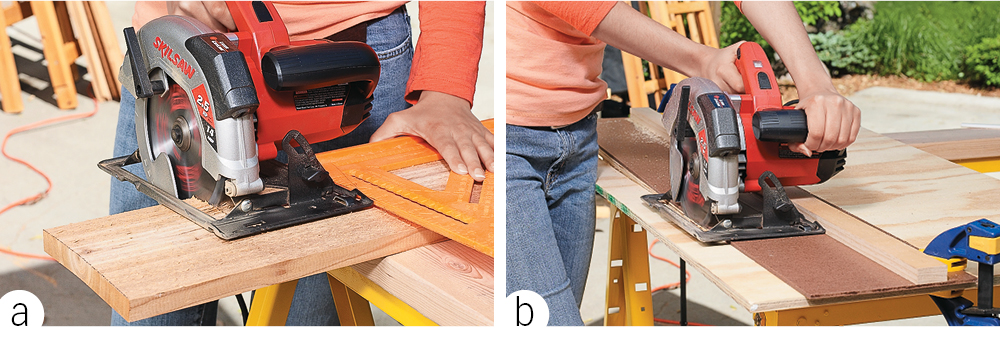
First, if you're making a cut across the board (a crosscut) the basic "speed square" is your go-to tool (photo a). Available in steel or plastic at the home center, it has a straight arm for 90-degree cuts, an angled arm for 45-degree cuts, and a "foot" that rests against the board. Just hold or clamp it into place, and run the saw along the square to make the cut. A second option is to use a straightedge. With a piece of hardboard and the straightest 1x2 you can find, you can make a basic straightedge that will become invaluable for longer cuts on panels and boards (photo b).
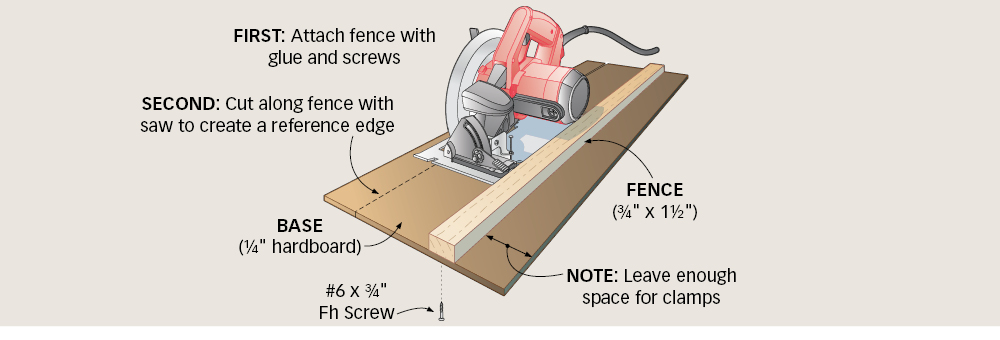
This straightedge is easy to make. The hardboard becomes the base of the straightedge, and the 1x2 becomes the fence. First, cut the 1x2 to the same length as the hardboard, and attach it with glue and screws.
Next, you want to make one side of the hardboard base a "reference edge" that will line up with the cut line. To do this, just cut down the side fence with the circular saw itself as indicated in the illustration above. Now when you're ready to cut, you just align the edge of the hardboard with your cutline and the cut will be perfect.
With all the choices available to you when you visit your local home center, I hope we were able to shed some light on the circular saw. Like I said early on, it's a must-have tool for any DIYer. Happy sawing!


