06/25/14, by Dennis Kennedy
Tools, Tips & Techniques
Last week in Circular Saws 101 I introduced you to one of the top-picked tools for any DIYer. This week, I'm back with even more circular saw information. I will offer up a few tips on how to operate the saw safely, and I'll talk about the blade as well.
But I thought I might take a few moments to revisit the different types of circular saws you will see while on your journey through the home center. You will come across the terms "worm drive", "sidewinder", "cordless" and "trim" when investigating circular saws.
A worm drive saw has the motor in line with the blade. They are usually heavier and bulkier than other circular saws. They will have more power and torque, which makes them better suited for the professional and heavy-duty DIYer.
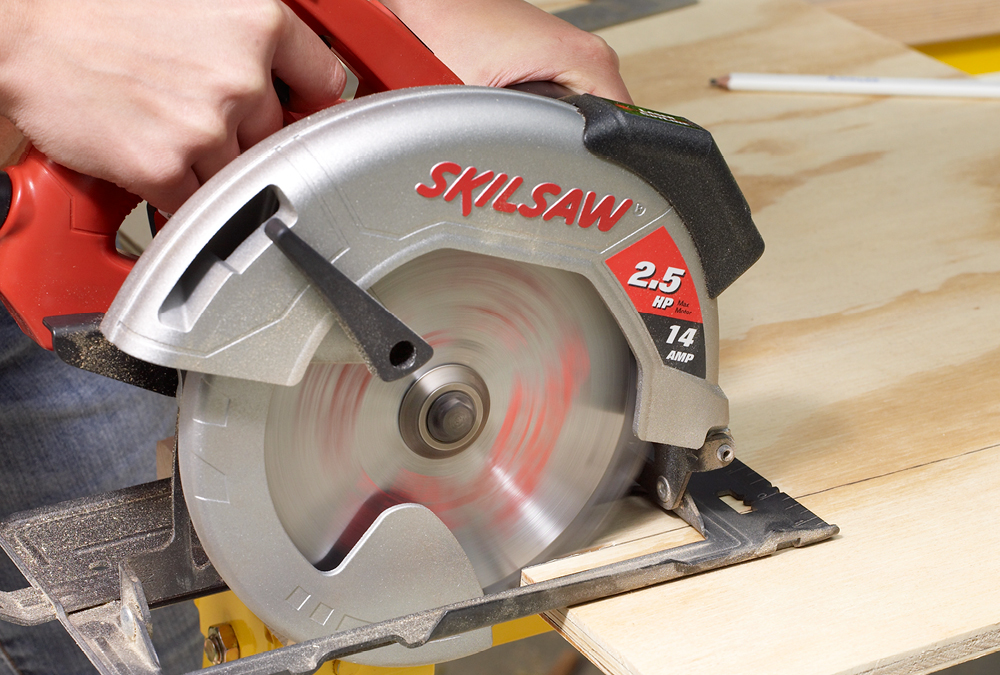
With the sidewinder, the motor sits alongside the blade. These saws can be left-handed or right-handed depending on which side of the blade the motor sits. The Skilsaw shown above is an example of a left-handed sidewinder. They will be lighter and less intimidating than the worm drive.
There are also a variety of cordless circular saws and kits available. As the name implies, they are powered by rechargeable batteries. This can be a nice alternative if your needs match up with its capabilities. Some of the battery sizes you will find are 14.4, 18, and 24 volt. As you'd expect, cordless circular saws generate less torque and have a limited run time based on usage. Most kits will have two batteries, which should be considered a minimum.
The trim saw is smaller in size with a blade size of 31/2" to 41/2". It's an excellent choice for trim work, but it's probably more of a specialty saw for the average DIYer.
Whatever saw you choose, safety is a priority! So here are a few tips for working safely and accurately.

This is an important part of the process. The sacrificial top allows you to make a cut with the cut line supported. For example, you can set a panel on top of the sawhorses and cut across it without worrying about part of the piece falling to the ground and getting damaged. This also eliminates the risk of the piece pinching down on the saw blade and causing kickback.
Smooth and straight cuts are always the goal, and even as a beginner it's possible. No matter the type of cut ─ either ripping or crosscutting, but I'll talk about these cuts in Circular Saws 103 ─ the first step is choosing the right blade.
With the right blade a circular saw will cut a variety of materials and cut them perfectly smooth. I've used my saw, with a masonry blade installed, to cut landscaping stone. But for now I will stick to cutting wood.
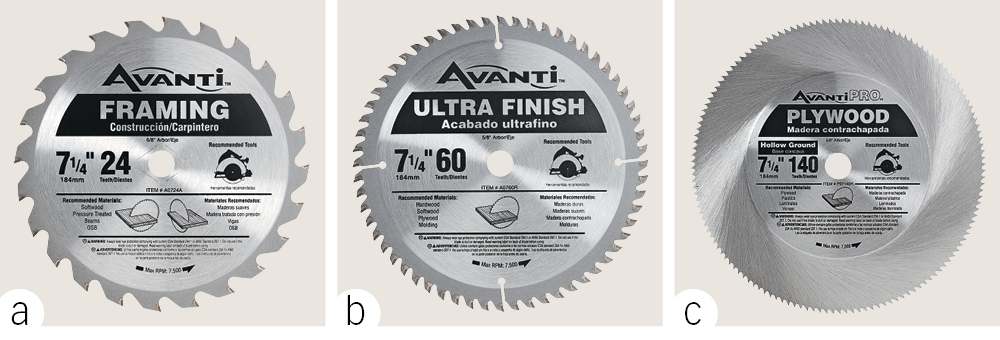
As with the saw, you have choices when purchasing a blade. The saw will probably come with a standard 24-tooth blade (photo a). For rough cuts in thicker stock, such as 2x4s, this blade will be just fine. It should also work for ripping sheet goods to width.
There may be some instances where you're working with nice wood and want the smoothest cut possible. In these situations, you might find it helpful to have a 60-tooth blade (photo b). And if you find yourself working with plywood, you might want a 140-tooth blade (photo c) for a smooth cut. These blades work well but tend to dull quickly.
Hopefully you've learned a few tips and a thing or two about circular saw blades. Come back next week for Circular Saws 103. I'll finish up this series with tips for making your cuts, including a jig that might help you fine-tune accuracy and get more from your saw.


