04/27/14, by Cate Seiser
Decorating Inspiration

You might remember this unusually large teapot we found on one of our salvage-store shopping trips a while back. From the moment we set eyes on it, we knew it would make a charming container for plants.
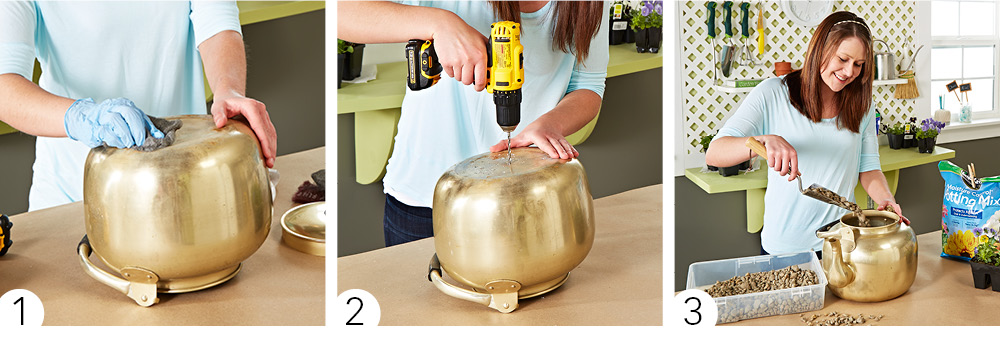
The original brass exterior wasn't in the best condition, but it had a vintage look and we decided to embrace it. A quick rub-down with steel wool helped clean it up and knock off some of the rusty spots (photo 1). Then for drainage, we drilled a series of holes in the base (photo 2). In no time at all, the teapot was ready to be put to use. Since our plants were relatively small compared to the container, we filled in the bottom few inches with rocks (photo 3) before adding soil and planting the plants.
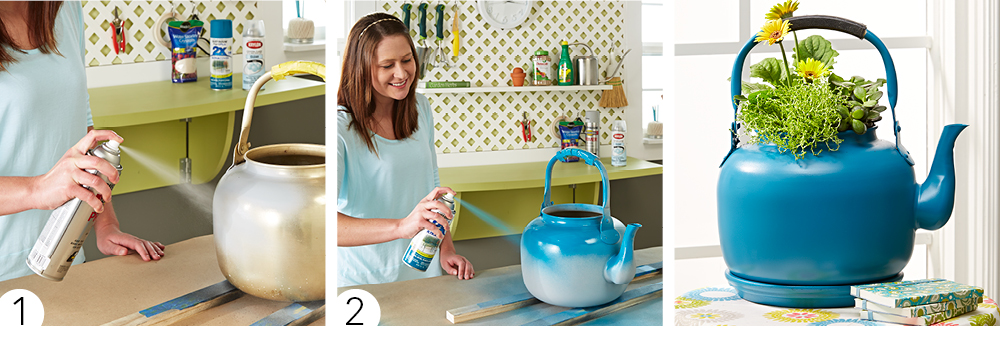
The time-worn patina of the teapot offered a lot of charm and suited outdoor spaces particularly well. But just out of curiosity, we decided to try painting it for a more modern indoor space. The surface was already scuffed up a bit, so we just had to give the teapot a coat of primer (photo 1) and a few coats of paint (photo 2). As protection from moisture, we also applied a clear topcoat. With the finish ready for indoor use, we just needed a water-collection solution: a terra-cotta saucer painted to match.
The teapot planter looks as cool in bright blue as it did in its salvaged condition. Keep this option in mind if you take on a similar project at home.


