03/31/14, by Megan Steenson
DIY Projects
If you’ve ever been to an architectural salvage store, you’ve probably seen a lot of unique old doors. Unless you have the right spot, there’s usually not much you can do with them.
But what if you took that old door and transformed it into something else entirely? That’s the inspiration behind this coat rack project, which at its core is a painted door and some knobs. With a little inspiration, you could create a similar project with any old door of your choosing.
We found the perfect door for our coat rack at our local Habitat for Humanity ReStore. After bringing it back to the shop, we cleaned it with soap and water, but we didn’t repaint it. The original paint contributed to the charm and appeal of the project.
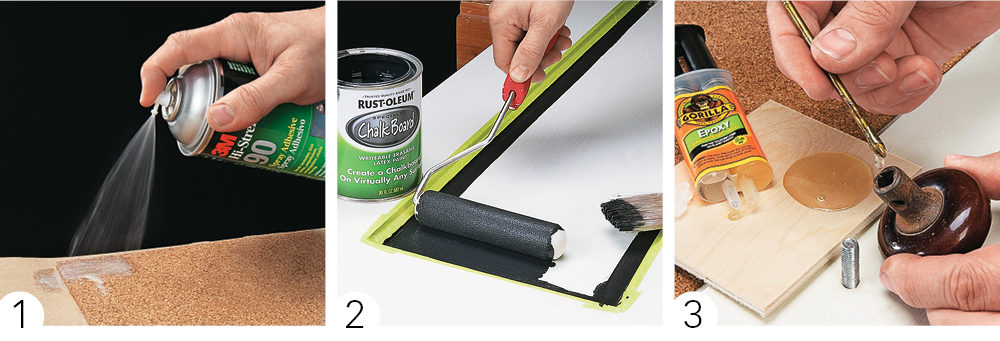
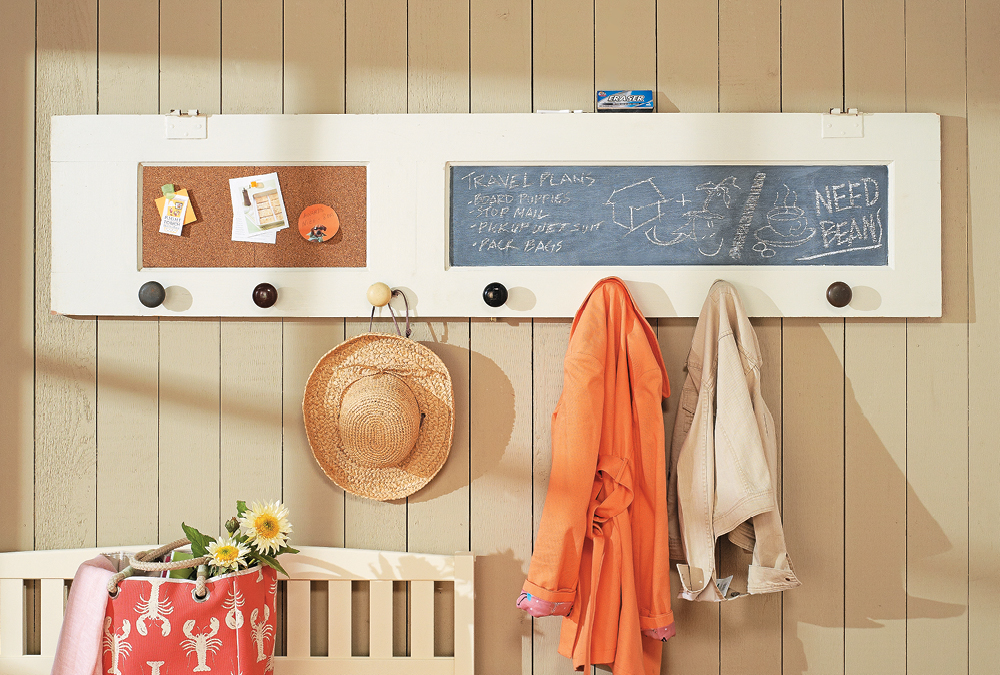
The door had two panels, which we thought would be perfect to turn into a corkboard and a chalkboard. The corkboard panels were available in 12" x 12" squares at a local craft store. We just cut two of them to size with a utility knife to fit the panel and mounted them with spray adhesive (photo 1). To create the chalkboard, we sanded down the other panel and taped it off. Then we brushed in the edges and rolled on two coats of chalkboard paint using a foam roller (photo 2).
We needed a creative way to hang coats from the door, and then it dawned on us — why not just use door knobs? So we headed back to the salvage store, where we found cool old knobs for $5 apiece. We spaced them evenly along the door, drilled holes, and mounted them on carriage bolts. Some knobs wouldn’t fit on the threads of the bolts, so we just secured them in place with epoxy (photo 3).
That just left hanging the coat rack on the wall. We put ours in a mud room, but any home entry would work just as well. To hang the door, we used a pair of Hangman picture hangers. These two-part hangers mount to your object and to the wall, and then they lock together for a secure, stable connection. We also ran a screw near the lower edge of the door for extra security. After that, it was just a matter of putting a few push pins in the corkboard, adding some chalk and an eraser for the chalkboard, and the coat rack was home-ready.


