10/15/14, by Megan Steenson
Decorating Inspiration
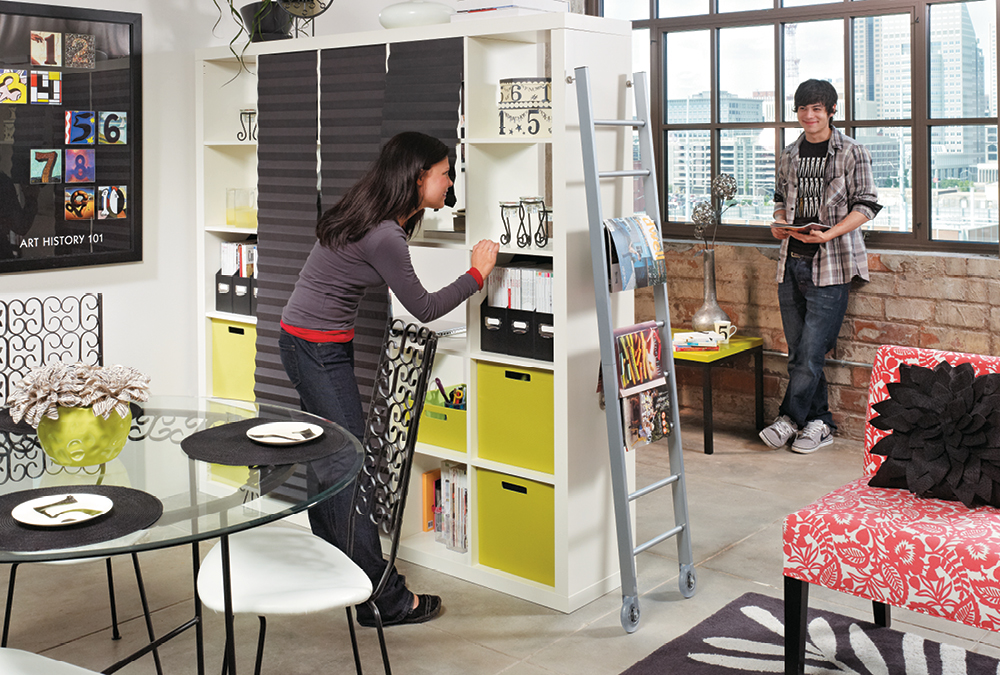
You don’t necessarily need a wall to establish some definition between two open spaces. Often, a simple room divider will do the trick just as well, or maybe even better.
To build your own room divider, start by selecting a shelving unit. Ours is an older model of the “Expedit” unit from Ikea. You can find similar models in department and home stores.
Because the shelves are completely open, everything stored or displayed on them can be seen from both sides. That can be good, but it can cause problems, too. To provide better visual definition between the two spaces, it’s a great idea to enclose some portions of the bookcase. The problem is finding an easy, elegant way to do that.
Here’s a solution that’s easy and economical: Use inexpensive window shades to close off a few columns of shelves. By doing this, you create a room divider that offers a perfect combination of shielded and open display space. That way, you can have privacy and semi-enclosed storage without losing display area.
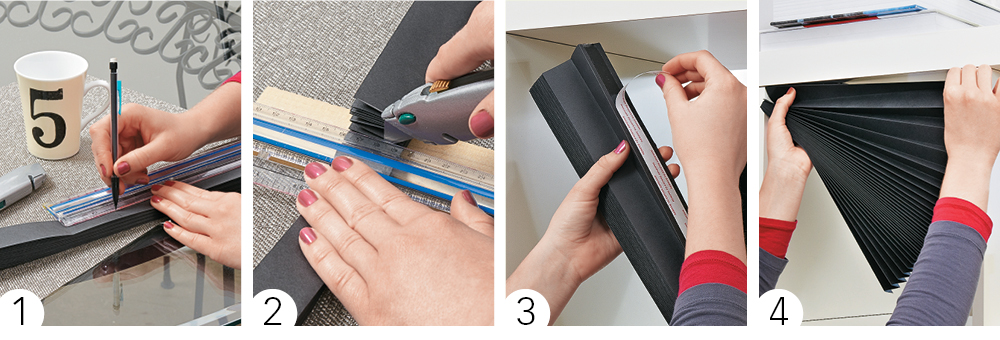
Once the bookcase is in place, decide which parts of the room divider you don’t want to see through from both sides. To enclose those areas, just pick up some pleated window shades. Ours are “temporary” shades that are made by Redi Shade. We purchased our 36" x 72" shades at a department store, but you can also find them online.
Measure the shelf width, and then mark the appropriate length on the shade (photo 1). Cut the shade using a utility knife and a straightedge. You’ll need to make several passes to cut through (photo 2). Next, peel off the backer strip to expose the adhesive on the shade (photo 3). Be sure that the fold of the paper is facing out. Attach the shade by first pressing it gently into place. Then rub with your thumb to fully adhere the shade (photo 4).
Once the shades are on, you can outfit the shelves with your favorite accessories and decor items. We used our new covered-storage space to house office supplies.
Resources:
Expedit Shelving Unit
Ikea.com
Black-Out Original Shade
RediShade.com


