10/10/14, by Megan Steenson
Tools, Tips & Techniques
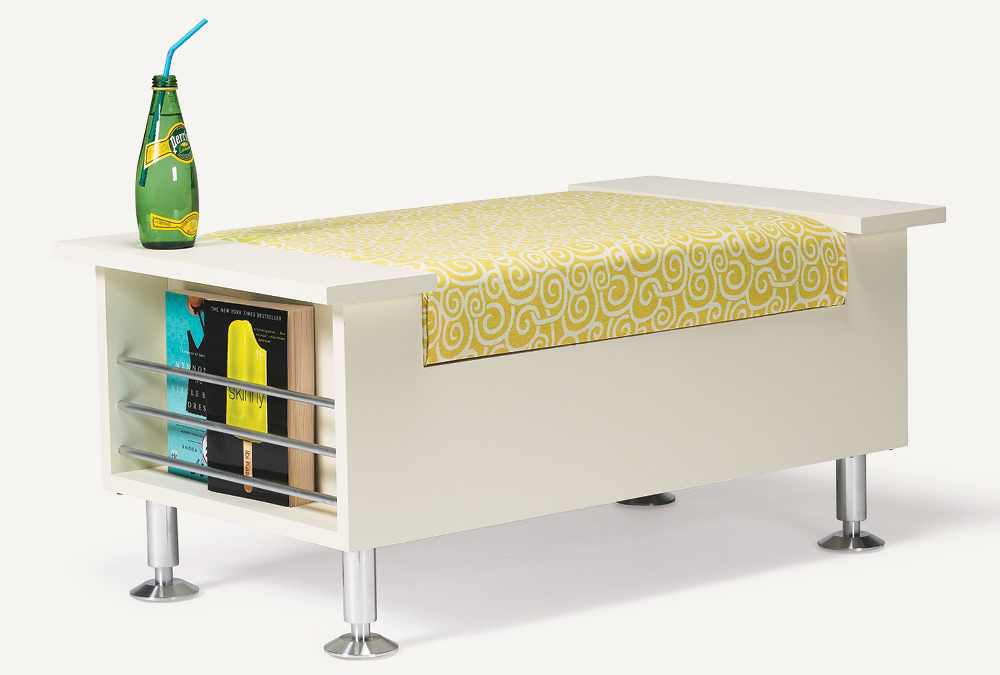
Having cushions custom-made can be expensive. However, making your own, as we did for the storage ottoman in this week’s eNote and the design option shown above, will save you a considerable amount of money. And don’t worry if you’re not handy with a needle and thread — these simple assemblies of plywood, high-density foam, muslin, and upholstery fabric don’t require a single stitch (see the Illustrations below).
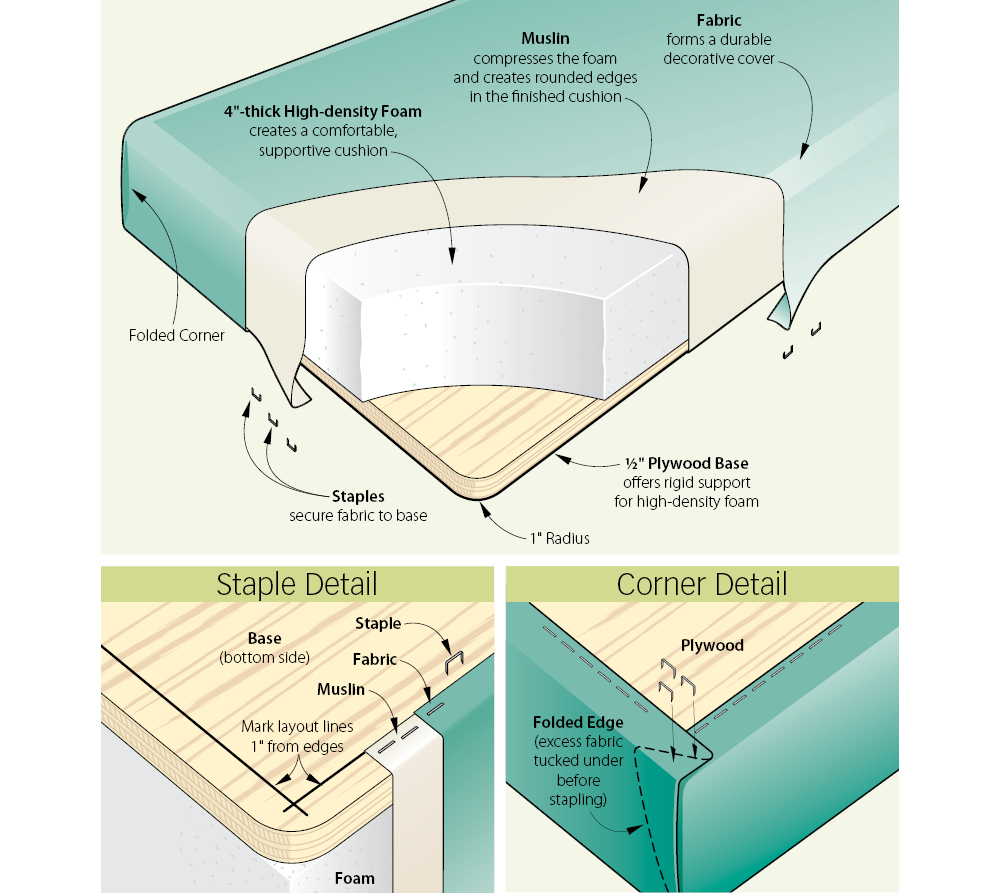
You’ll want to start by determining what the dimensions of the finished cushion need to be, and have the foam cut to match. Then, subtract 1/2" from the length and width of the foam, and cut a plywood or MDF base to these dimensions. Use a jigsaw to cut round corners on the base.
Next, mark layout lines on the base 1" in from each edge. These will be a reference when stretching the fabric over the foam and base.
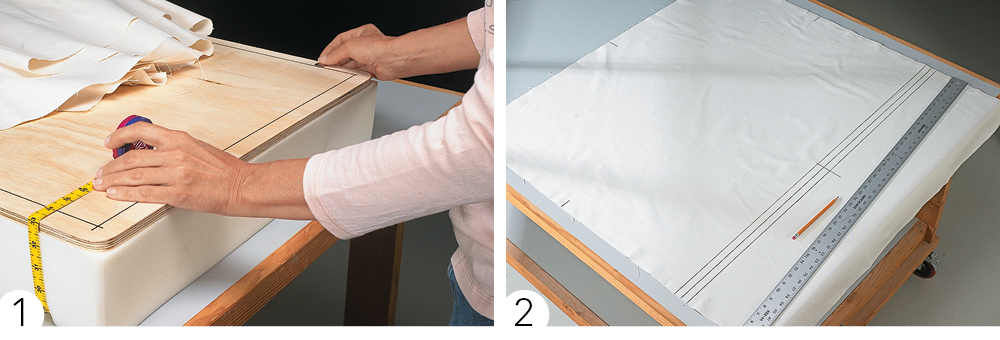
To determine the length of the muslin (front to back of the cushion), you’ll need to pull a flexible tape measure snugly around the foam and base to compress the foam (photo 1).
Transfer that dimension onto the muslin (photo 2). This is done by measuring from one end of the muslin, and drawing a line. Draw two more lines, one on each side of the first line, 1" away. These lines will come into play if you need to tighten or loosen the tension on the muslin as you attach it.
Now measure 15" beyond the line furthest from the end of the muslin, and cut the material here. This extra length will make it easier to grip the muslin as you pull it.
Use your flexible tape once again to measure around the width (side to side on the cushion) of the foam and base. Just as before, pull the tape taut, slightly compressing the foam. Cut the muslin to this exact dimension.
Mark centerlines on all four edges of the muslin and base. These will help you center the foam and base on the muslin and avoid twisting the material as you pull it.

Staple the muslin in place along one edge of the plywood, making sure the staples sink in completely (photo 3). Now pull the muslin so the middle line on the fabric aligns with the layout line on the base. For a rounder edge, pull the muslin to the next guideline. For a crisper edge, ease tension off the muslin until the first guideline matches the line on the plywood base. Staple the muslin at the desired tension (photo 4). Repeat the process for the sides of the cushion, and then trim the excess muslin at each corner (photo 5).
Cutting, marking, and applying the fabric are similar to the procedure used for the muslin. One important difference is that you’ll cut the fabric to exact dimensions (no extra for pulling).
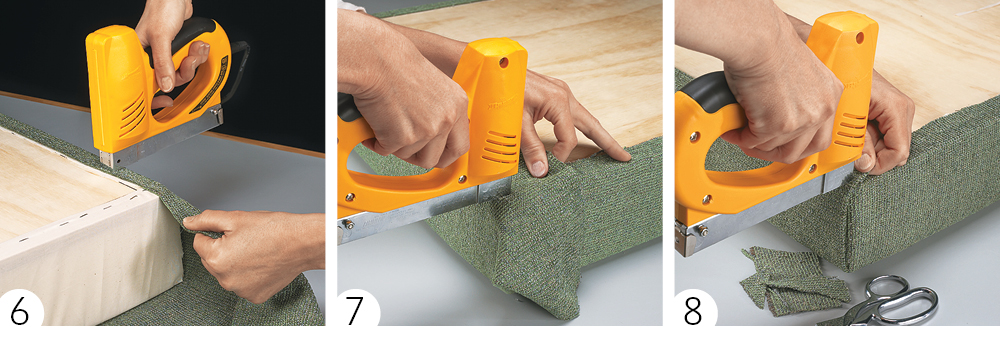
Staple the fabric to the front and back edges. Stop 4” short of the corners to allow room for the final corner folds (photo 6). Now continue stapling the fabric along both sides of the cushion (photo 7). Here, you can go all the way into the corners. Finish your cushion by trimming, folding, tucking, and stapling the fabric in each corner (photo 8). Make it so the seam in the fabric faces the side of the cushion, this will leave your cushion with a nice, polished corner.


