08/19/14, by Megan Steenson
DIY Projects
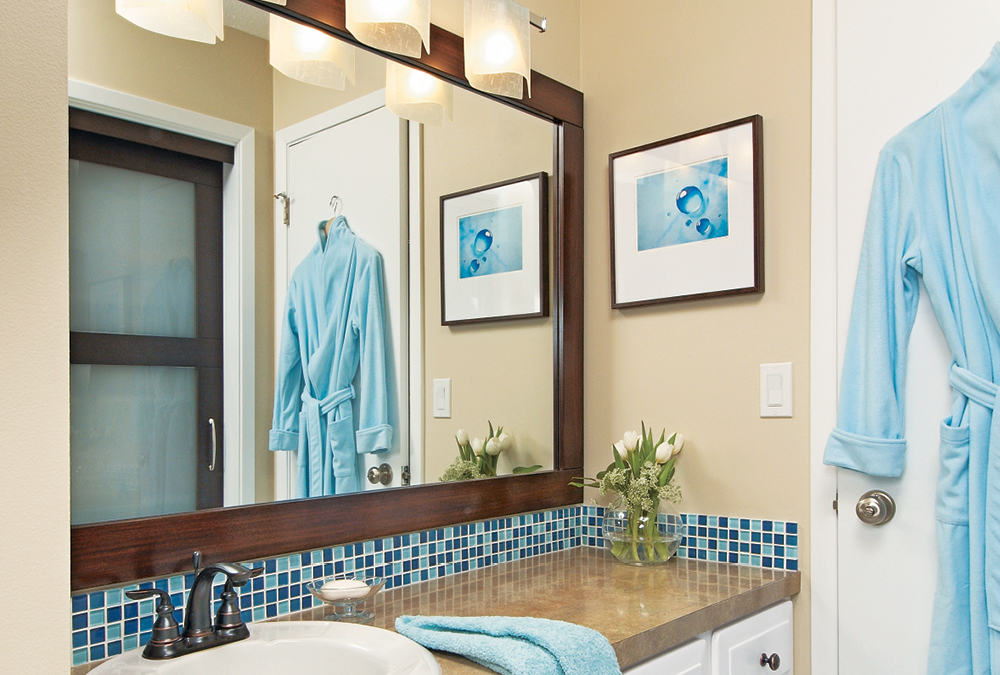
This bathroom looks shiny and new, but it didn’t start out that way. The lighting, tile, faucet, and counter were all updated to give it a bit more style. But it was still sporting a plain old slab mirror, which seemed out of place.
Instead of replacing the mirror, we created a basic frame that gives it a bold, sophisticated look. To do this in your home, all you need are poplar 1x4s and two-sided automotive tape.
Get started by carefully measuring your mirror and cutting boards to length accordingly. We kept it simple by using butt joints in the corners instead of miters. (The length of the vertical pieces equals the height of the mirror minus 7" since 1x4s are actually 31/2" wide).
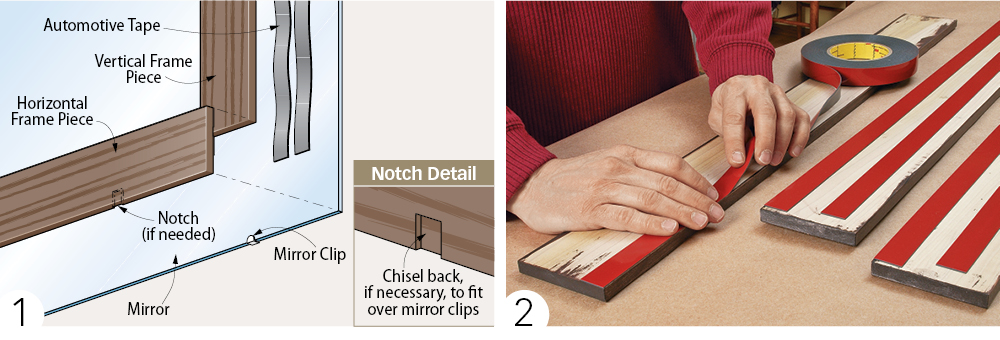
After softening the edges of the frame pieces with sandpaper, stain or paint the boards to coordinate with other elements in the room. If your mirror is attached to the wall with clips, you’ll also need to create notches using a chisel (photo 1, detail illustration).
Once that’s done, you can apply strips of automotive tape to the boards (photo 2). Finally, stick the frame pieces onto your clean mirror. Start at the bottom, concentrate on one piece at a time, and use caution because there are no “do-overs” with this adhesive. It provides a strong, waterproof seal.


