03/03/14, by Megan Steenson
DIY Projects
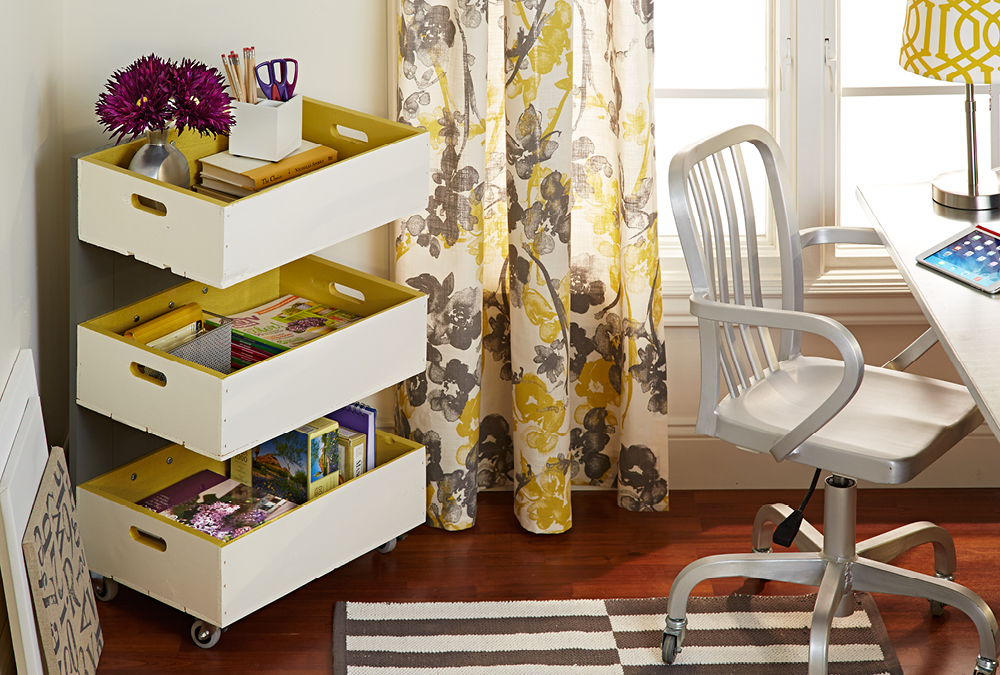
A while back, we asked you to help us decide what to do with three plain-old wood storage crates. Last week we announced the winner. Now we’re back to reveal the final project. It’s made by attaching the three crates to 1x4 backer boards — one crate serves as the base and the other two are suspended above it. (The result is more of a cart than a side table with storage, but you could use it either way.) Read on to see how it's done!
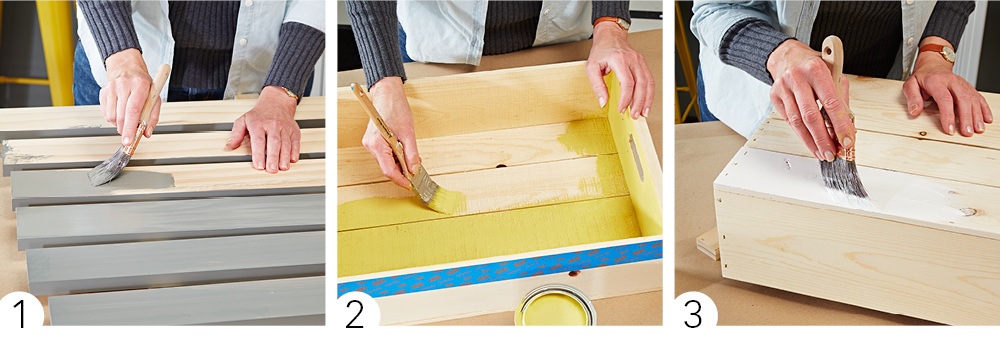
We started the project by preparing the backer boards. We cut six 29"-long 1x4s and then lightly sanded the edges smooth. Each board got two coats of Benjamin Moore’s Kendall Charcoal paint (photo 1).
While the backer boards were drying, we moved on to the wood crates. We decided to add a pop of color to the inside (photo 2). For this, we chose Benjamin Moore’s Angel’s Trumpet. As a subtle bonus, we extended the color to the top edge of each crate.
Last but certainly not least, we painted the outside of the crates with Benjamin Moore’s Mayonnaise (photo 3). Since we had painted the top edges yellow, we simply propped the crates up on wood blocks and carefully painted to the edges.
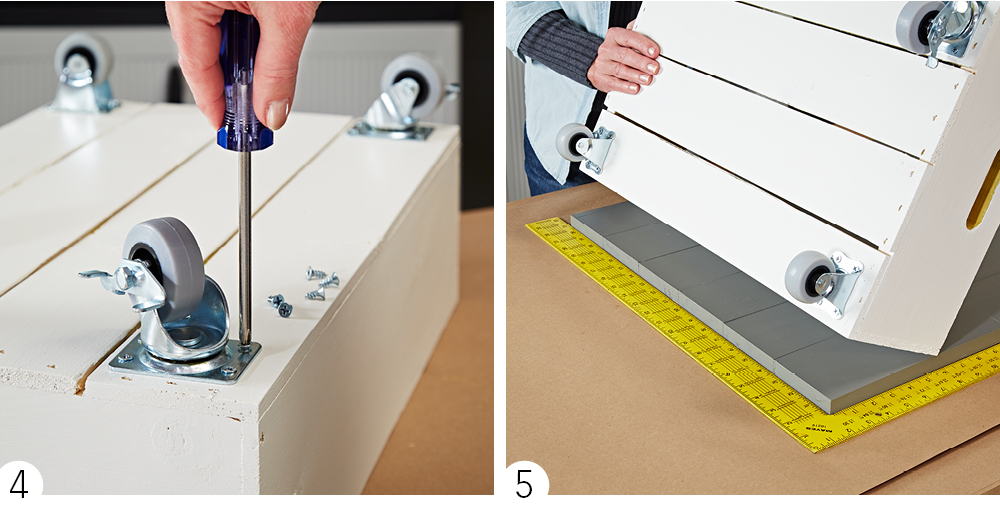
Being mobile is a great quality for a storage cart. Once the paint was completely dry, we attached casters to the bottom crate, which would serve as the base (photo 4).
Then we started assembling the crate — working from bottom to top. To do this, we laid out the backer boards and positioned the bottom crate (with casters) so the edges were flush (photo 5). A framing square ensured the backer was straight.
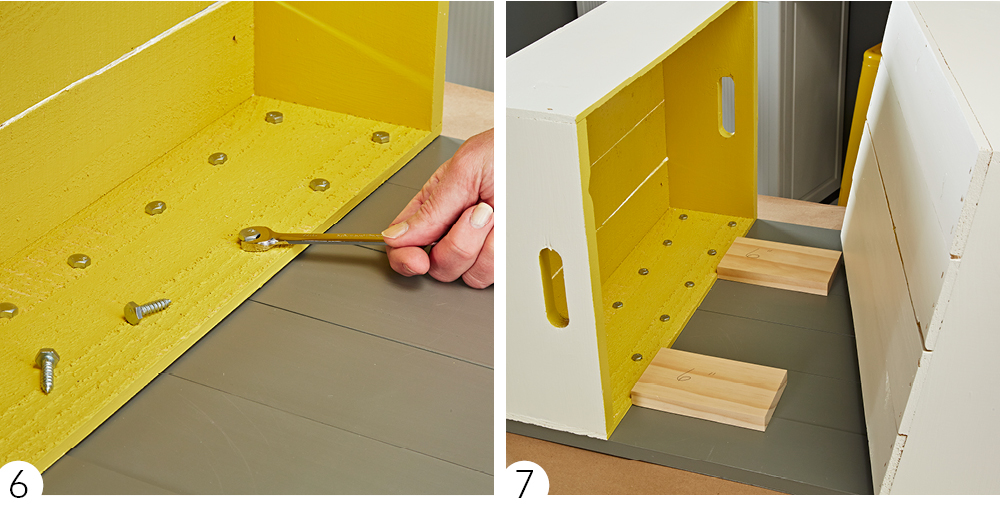
With everything aligned, we secured the crate to the backer boards using two rows of lag screws (photo 6). This provides plenty of support, plus the silver heads lend a cool industrial look.
Next, we positioned the middle crate, using 6"-long spacers to make sure everything was even (photo 7). We attached the crate using the same lag screws as before and then repeated the process again for the top crate.
We love how the cart turned out and how much storage space the crates provide. Thanks for voting on the project concept — you guys picked a good one!


