03/26/14, by Megan Steenson
DIY Projects
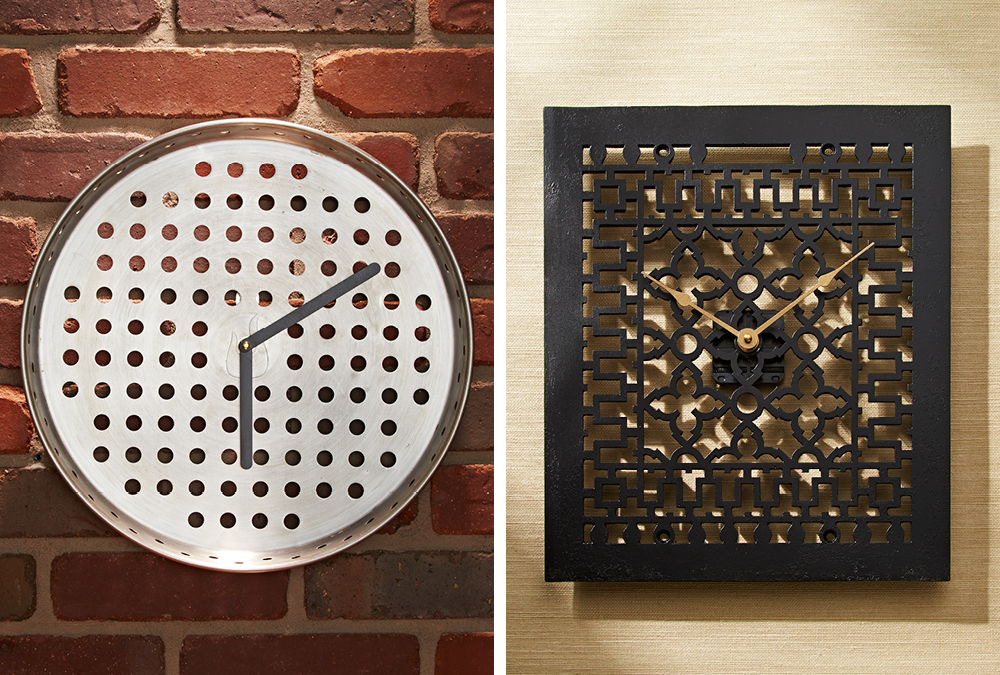
In a recent eNote, we showed you how to create a vintage tin tile clock. We loved the look of that project so much, we decided to come up with a couple more versions made of other types of salvaged items. Both clocks use movements and hands we purchased locally, but you can find them online, too.
Creating the clocks started with a trip to one of our favorite local antique stores. We hit the jackpot when we found an old deep-dish pizza pan and an antique cast-iron vent cover. Both items were screaming for a makeover!
Up first, we tackled the deep-dish pizza pan. The circular cutouts gave the pan a fun look, and the stainless steel was appealing, as well. We kept the style of the hands simple, choosing a classic black so they would stand out. But before we could attach the hands, there were a few steps we needed to cover.
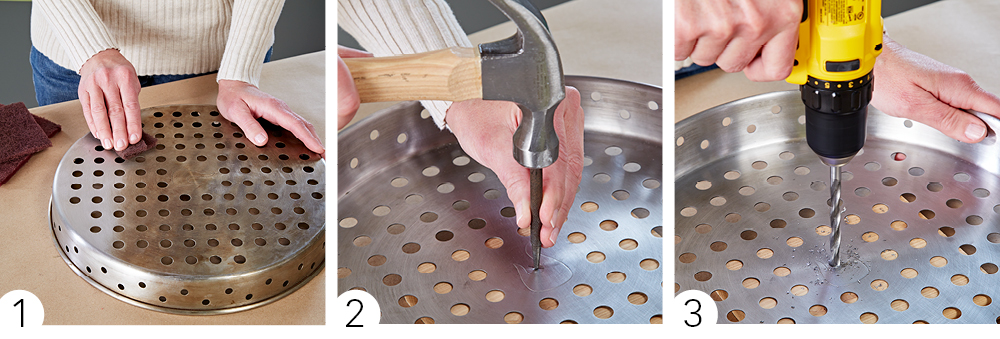
We started by removing any dirt, grime, and grease from the pan using a Scotch-Brite pad (photo 1). Then we needed to create a hole in the center of the pan for the clock movement. Denting the center of the pan first — with a nail set and hammer — created a small indent to help keep the drill bit centered (photo 2) while drilling the hole (photo 3).
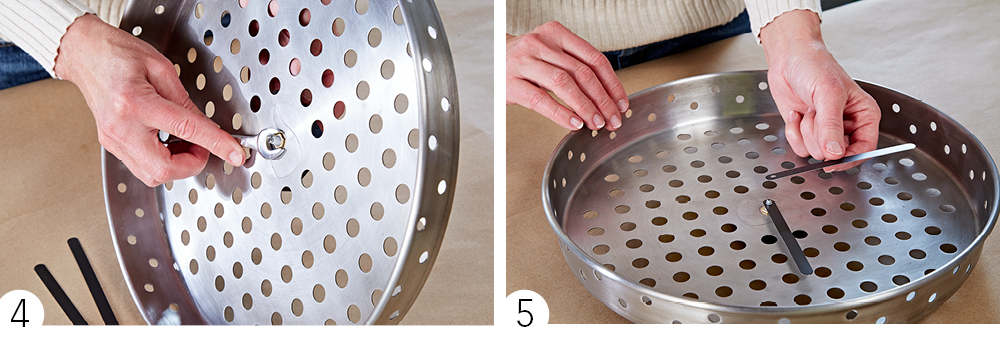
After creating the center hole, we carefully inserted the clock movement through the back of the pan and tightened the shaft on the front (photo 4). Adding the hands and front fastener completed the clock (photo 5).
The cast-iron vent cover had a lot of character and charm. And its see-through design made for an easy clock conversion. Here’s how it came together.

The first thing we did was spray paint our clock hands to make them stand out against the black cast-iron. We chose gold paint to add a bit of glitz and glam (photo 1). Since the vent cover was thicker than a typical clock backer, we ordered a longer shaft for the clock movement. Once that was inserted from the back, we needed to add a large washer on the front (photo 2). The washer that came with the clock kit would have slid right through the vent cover, but the larger washer allowed us to tighten the movement in place. Then we simply added the freshly painted hands and secured them to the movement (photo 3).


