03/09/14, by Megan Steenson
DIY Projects
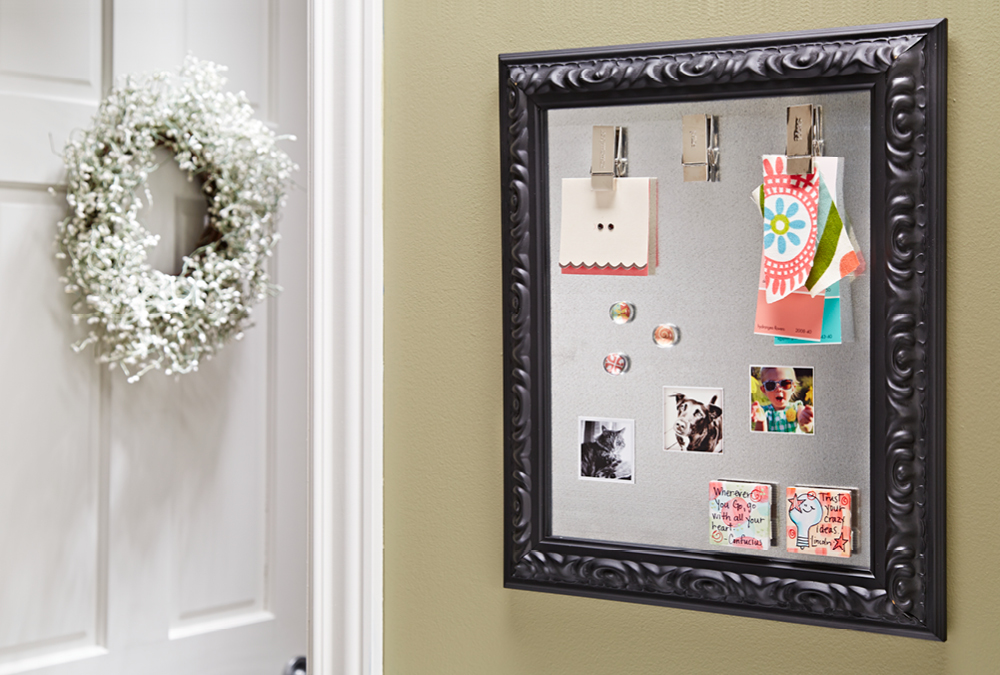
There are all sorts of magnets available these days — from family vacation souvenirs to printable magnetic photos. Most people just cover their refrigerators with them, but this decorative and functional magnet board lets you show them off in any room.
You can make one in just a few simple steps and with minimal materials. The magnetic surface is galvanized steel flashing, and we found an open wood frame at Hobby Lobby to display it in. We chose this frame for its size and interesting carved details, but the color wasn't quite right, so we decided to paint it. Of course, your choice of frame will give your project a completely customized look.
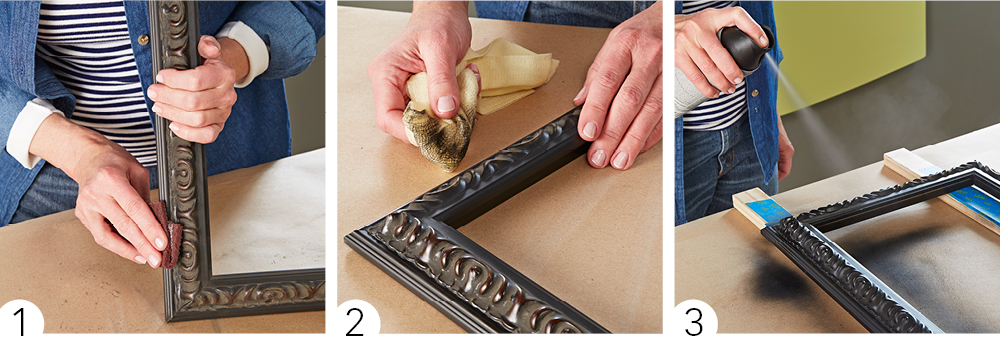
If you wish to paint your frame, start by scuffing up the surface (photo 1). Scotch-Brite pads are perfect for this task because their flexibility lets you get into all the tight spaces without damaging the wood details. Then use a tack cloth to remove any dust and dirt (photo 2).
Now you're ready to paint. We stuck painter's tape to two scrap pieces of wood (to prevent sticking) and used them to prop up the frame. Then we gave the frame a couple light coats of Valspar's Color Radiance Flat Black spray paint (photo 3).

While your frame is drying, prepare your backer materials. You'll first need to cut a piece of cardboard to size using a framing square and utility knife (photo 4). Next, trace your cardboard backer onto a piece of metal flashing (photo 5). This will ensure that both pieces match up in the frame. The metal flashing is easy to cut with tin snips (photo 6), but be careful when handling the material — the edges may be sharp.
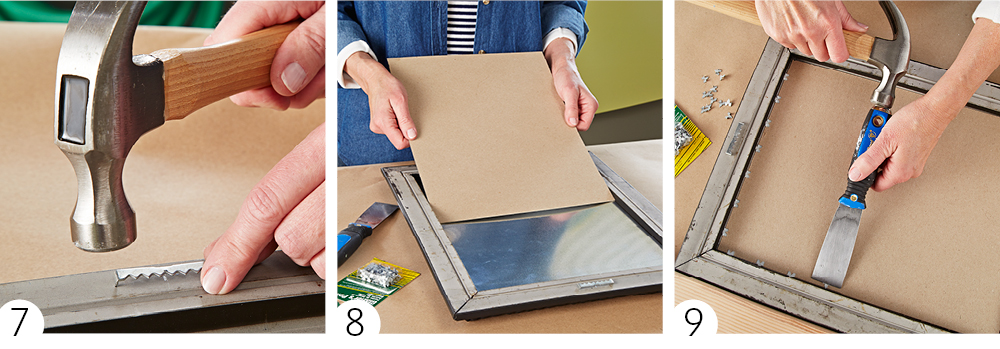
Before you start assembling the magnet board, you'll want to attach a saw tooth hanger to the back of the frame (photo 7). Then, place your metal flashing and cardboard backer into the frame (photo 8). Finish up by securing the materials in place with glazier's push points. The method we used — and had the most success with — was to use a putty knife and hammer to tap each point into the frame. Make sure to use plenty of points so your backer is secure.
Resources:
Amerimax 10" x 50" Galvanized Steel Flashing
lowes.com
11" x 14" Black Chocolate New Manhattan Open Frame
hobbylobby.com
Workforce Glazier's Steel Push Points
homedepot.com


