Connect With Us:
Create an Account
|
Forgot your password?
Login
my
library
my
favorites
my
extras
Main Menu
Home
DemiZine
eNotes
Blog
Gallery
online extras
online extras
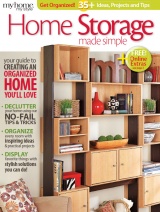
Home Storage Made Simple
October 15, 2013
PDF: Compact Corner Office
PDF: Pull-Out Kitchen Pantry
PDF: Garage Storage System
PDF: Dramatic Display Case
PDF: Ladder Magazine Rack
PDF: Window Display Shelf
PDF: Pull-Out Pantry
PDF: Easy Entryway Organizer
PDF: High-Style Tower Shelves
PDF: Recessed Wall Niche
PDF: Decor Display Shelves